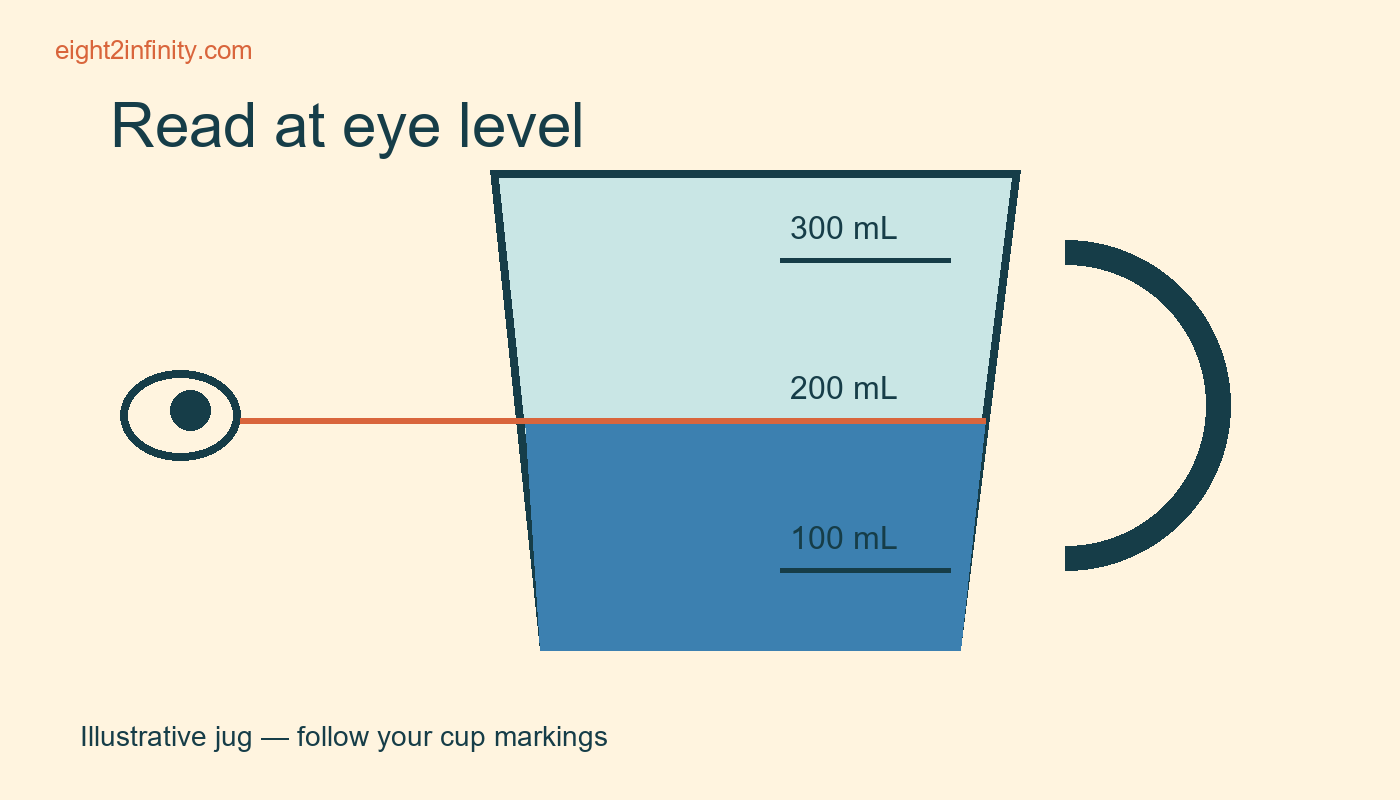
Read a liquid measuring cup at eye level
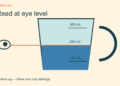
Set a transparent liquid measuring cup on a level surface and bring your eyes to the height of the required mark before reading it. Let the liquid settle and compare its surface with the cup's scale. For a clear liquid with a visible meniscus, read the bottom of that curve as the cup's instructions direct. This helps avoid a misleading angled view. Use the measurement system and quantity stated by your recipe rather than assuming every cup mark is interchangeable.
Choose a cup suited to the task
Use a liquid measuring cup with readable graduations, space above the measurement line, and a pouring spout. Inspect it for damage and make sure it is appropriate for the ingredient and temperature involved. A dry measuring cup filled to its rim serves a different measuring technique and can be awkward to move without spilling liquid. If your recipe provides a weight for a liquid ingredient, a suitable scale may be another option, but follow that recipe's own measurement guidance.
For a simple practice, use room temperature water and a cup marked in milliliters. Choose 200 mL if that mark is clearly printed on your cup. This is a reading exercise, not a recipe conversion. The water can be used appropriately afterward rather than discarded solely for the demonstration. Keep the work area uncluttered and away from electrical equipment so a small spill remains a manageable household inconvenience.
Identify the correct scale first
Many cups carry more than one scale, such as milliliters and cup fractions. Find the 200 mL mark and trace the nearby labels before pouring. Confirm that you have not followed a line from a different scale on the opposite side of the cup. If a recipe says cups, identify which cup convention it uses before converting. Cup sizes can differ by convention, so an unlabeled mental conversion is a poor substitute for the actual recipe and measuring tool.
Set the cup on a level counter and pour water close to the target. Stop before the final amount and allow the surface to settle. Holding the cup in your hand makes it easier to tilt or slosh, which can interfere with reading. The aim is to compare a still surface with a fixed mark. If the counter is uneven, move to a suitable surface rather than trying to compensate by tilting the cup until the line looks right.
Change your viewing angle deliberately
Look down at the scale from a standing position and note the apparent level without treating it as final. Then lower your eye to the height of the target mark. Notice whether the apparent relationship changes. This illustrates why viewing angle matters when the printed scale and the liquid surface are seen through a curved transparent container. Do not hold the cup up near your face to imitate eye level if that causes the water to move.
With your eye level with the mark, inspect the curved surface of the water. Use the bottom of the visible meniscus for this clear water exercise, following the cup maker's guidance. Add or remove a small amount if needed, then allow it to settle again. You are seeking a practical kitchen reading at the resolution of your cup, not claiming laboratory precision from an ordinary household measuring tool.
Make the final adjustment slowly
If the water is slightly low, add a little rather than another uncontrolled pour. If it is high, remove a small amount with a clean utensil or pour carefully into another suitable container. Recheck after each adjustment. Keeping the cup stable throughout the process is more useful than repeatedly lifting it to inspect the line. Once satisfied, pour the measured quantity into the recipe vessel as directed, taking ordinary care to transfer the intended ingredient.
Thick, foamy, or opaque liquids can make the surface harder to judge than clear water. Let foam settle when appropriate and follow the ingredient, recipe, and tool instructions. Do not assume the clear water demonstration resolves every possible ingredient. A sticky liquid may also cling to the cup, introducing a transfer issue distinct from the initial reading. If the recipe supplies a preferred weighing or transfer method, use that guidance instead of forcing every ingredient through this example.
Troubleshoot the marks rather than guessing
If the graduations are worn, crowded, or impossible to distinguish, use another suitable tool. Estimating between marks has limits, especially when a recipe needs a small amount relative to the cup's capacity. A large jug may be inconvenient for a very small volume. Choose a measure that gives a clear reading for the quantity required. Do not write a precise number in your recipe notes if your tool did not let you measure that precisely.
King Arthur Baking's measuring guidance recommends a stable surface and an eye level reading for liquid measures. The exact 200 mL practice and comparison exercise here are original teaching examples. They do not certify your cup's calibration or establish a universal volume to weight conversion. Different liquids have different densities, so a milliliter reading should not automatically be treated as the same numerical number of grams for every ingredient.
Try a second target
Repeat the exercise with another clearly marked amount on your cup. Predict whether your first standing view tends to make the surface appear above or below the line, then compare it with the eye level view. Which scale was easiest to read, and did the cup remain level while you adjusted the amount? Record the useful habit rather than a claim of perfect accuracy: identify the right mark, settle the liquid, read at eye level, and verify before pouring.
Sources and related reading
Check the Butter and Sugar Creaming Step Before Adding Flour